Clean Shower Massage

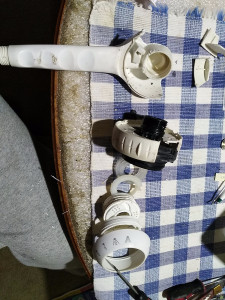
Don't bother taking it apart, put it in a plastic bag and fill the bag with vinegar or CLR to remove the lime, seal the bag with a twist tie prop it up so the bag isn't leaking for what ever length of time to get the gunk out. Then flush and it should work almost like new!

Rich

Reply to
Rich
Loading thread data ...

I have a Waterpik Shower Massager head

formatting link
that I want to disassemble to clean, but I cannot figure out how to take it apart. Does anyone here know how?

Reply to
mcp6453

Don't know how to disassemble, sorry. But you might try soaking in vinegar. I find this dissolves the minerals that are clogging things, and clears up the flow. May need to soak for an hour or two, or even overnight.

Terry

Reply to
Terry

Reply to
Michael Baugh

Would like to add , if you can heat the vinegar up before you dunk the shower head in, it cleans a bit faster.

Bx

Reply to
Boxhead

Most showerheads don't come apart. Ocasionally a piece or two come off but generally the chamber is sealed to prevent leaks.

Reply to
PipeDown

Don't take it apart. You can use a lime dissolver; or half-fill a sturdy plastic bag with vinegar, tie it around the head, and soak overnight. This will dissolve deposits inside the head.

Reply to
Phisherman

mcp6453 news:7UV5f.75699$X21.45744 @fe07.news.easynews.com:

Have you tried CLR? You can get it at Eckerds, etc. I've had some good results with that. Let it soak for awhile.

cheers, david

Reply to
david gourley
Re: Clean Shower Massage open original image

replying to mcp6453, CaptainK wrote: See the picture remove the outer white ring in the picture it's the one the screwdriver is touching. Then wrap some cloth material around the black part and unscrew it from the handle, then the rest easy

formatting link

Reply to
CaptainK

replying to CaptainK, CaptainK wrote: Not to worry, if done right you will not break, I sacrificed mine to find out for you. The spray adjustment ring unscrews counterclockwise when looking at the face of the spray nozzle..... revealing enoung of the black part to unscrew it from the handle.......

Reply to
CaptainK

replying to CaptainK, CaptainK wrote: Correction to above: Not to worry, if done right you will not break, I sacrificed mine to find out for you. The spray indicating ring(in pic touched by screwdriver) unscrews counterclockwise when looking at the face of the spray nozzle..... revealing enoung of the black part to unscrew it from the handle.......

Reply to
CaptainK

replying to mcp6453, Judi Lariviere wrote: The center area on the face is actually a screw that holds the unit together. Turn it to the left to unscrew. Depending on each model, you can either carefully remove the parts or remove the entire workings of the head.

Reply to
Judi Lariviere

HomeOwnersHub website is not affiliated with any of the manufacturers or service providers discussed here. All logos and trade names are the property of their respective owners.