how to build concrete berm (think speed bump only smaller)

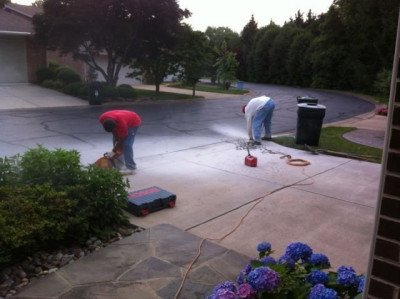
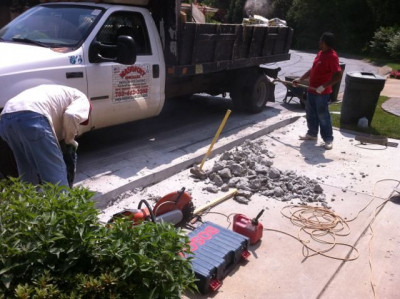
We have a downward sloping driveway and a very shallow gutter on the apron of the street. There are lots of discussions in the forums about building concrete berms to keep water out of a garage but generally the answers fall into three categories:

  1. use a pre-formed speed bump type material.
  2. use asphalt, not concrete.
  3. dig a trench for a french drain.

We already have a french drain at the door entrance to the garage. For your typical rain storm, the french drain works great. But, when we get a heavy rain, the drain is overwhelmed plus we get a tremendous amount of debris washed in from the street. Eventually the garage floods. I cannot use asphalt because the home owner's association wants the berm to match both the existing concrete apron on the street and our driveway. For a similar reason the have rejected any of the pre-built options I have found online and at the home repair stores.

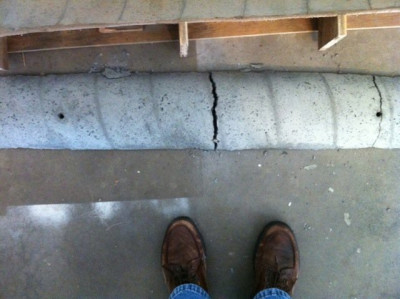
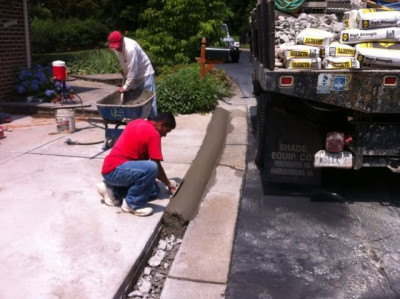
So I want to build a small berm at the top of the driveway where it meets the side of the street and cast this from concrete.

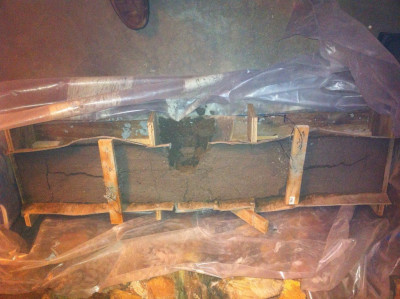
I have constructed a form using a cut away from an 8" concrete tube and poured a 4' concrete segment. The berm segment is approximately 6" wide by 2.5" high. I will need a total of four segments to cover the width of the driveway. My form includes provision for anchor bolts to hold the segment down. I plan to use cording and concrete adhesive between segments to allow for contraction and expansion and to provide a water repellant seal. I made my first pour this weekend using Sakrete 5000 concrete mix and while the segment came out perfectly it broke into four sections as soon as I took it out of the mold. It appears there was no structural integrity of the segment.

So after this long winded explanation, I'm looking for guidance. Should I use a different kind of concrete mix? I did not add rebar; the thickness did not seem to warrant any; should I use reinforcement and if so what kind? Should I somehow put the concrete under compression as I do the pour?

Thanks in advance for any advice.

Reply to
jdanilson
Loading thread data ...

I could not quite get your timing: how long was the segment curing before you removed it from the mold? Did you keep it wet while curing? Safe to assume not in freezing temperature?

Also, 2.5" thick is just about the minimum for concrete, and specifically for Sakrete 5000 Plus which is a mix for pours thicker than 2", which means it contains coarse aggregate (gravel or crushed stone). You would want to avoid coarse aggregate in a piece this thin. Perhaps even use a mortar based leveling compound mix, not a concrete mix. It's still Portland cement based, just no coarse aggregate and some polymer modifier. It's a bit more expensive than concrete mixes but I think maybe more appropriate for what you want to do. It'll have a better looking surface, too.

Reply to
homeowners

Thanks for replying.

The temperature was mid 60's and the form set up over night in the garage. It was probably 17 or 18 hours setting up.

I am not familiar with concrete products. Can you give me some specifics on the type of material you are recommending and possibly a brand name? Would this product need any reinforcement such as rebar?

Thanks

John

Reply to
johndanilson

Hi John,

17-18 hours is a bit too fast. I would not touch anything cast from concrete in 24 hours and preferably longer than that. Concrete continues to gather strength for weeks after the pour but the first 24 hours are the most critical in terms of strength. Since yours does not sound like a rush project, I would pour the mix, wrap the mold in a plastic sheet to keep moisture in and just left it for 2-3 days. It'll be a slow process but the strength of the sections will be enough to handle them. Even then, you would want to keep them away from traffic and keep them moist for another week or two before putting them to use.

I'm trying to think about the best mix you can use and here is a dilemma: 2.5" thick is an odd size that's a bit too shallow for your regular concrete mixes (2" and up) and a bit too thick for most leveling compounds (up to about 1"~1.5"). Laticrete makes a good thick layer self-leveling compound called LATICRETE NXT LEVEL which will work though I am not sure if it's available in home improvement stores. In other words problem with the more common compounds like LevelQuik RS which is sold in HD is that they lack fine aggregate (river sand or similar). If you can add sand to LevelQuick - that would be your best mix but I understand that this kind of defeats the purpose of buying a ready mix in the first place.

Anyhow, I think that your best course of action at this point would be to simply sift the Sakrete mix you already have to remove the largest pieces of gravel and keep the size of aggregate to about 1/4" or less. That will let you safely pour thinner casts like you need. And definitely give it more time to gather enough strength for handling before removing from the mold (see above).

It would be awesome if you can post pictures of your project! (the "image" button at the bottom of this form lets you upload pictures)

Good luck!

Reply to
homeowners

Thanks for the very informative reply.

In addition to lengthening the curing time to several days and keeping it wet the main issue seems to be the type of concrete to use.

Here's what I've gotten from your post so far.

  1. sakrete 5000 but screen out anything > .25".
  2. Laticrete
  3. LevelQuik with added sand.

It sounds like #1 is what you think is best. It's certainly no problem for me to mix in sand. If I go with option #1 do I need to replace the removed aggregate with anything?

I have uploaded three photos showing the form, the driveway including the street to the french drain, and a shot of a level showing the grade down toward the house.

If you look at the form picture, note that the pour is not to the diameter of the tube; it is to a chord which bisects the tube at 2.5" from the apex resulting in a base length of about 6". The aluminum level shown resting in the form is at the height of the pour. The two dowels are used to cast holes which will be used for anchor bolts.

Hopefully the pictures have uploaded.

Reply to
johndanilson

Hi John, I just think option #1 is the easiest and cheapest since you already have the mix, just need to get a proper screen (HD sells it). I don' think there's a need to add anything to the mix, it already has the fine aggregate in it. You can, however, add sand in the amount (by volume) of the gravel you remove by sifting - that will let you make a bit more concrete from the same amount of mix, and sand is cheap compared to the cement mix.

Unfortunately, the pictures didn't make it through. Disqus, the third party system that supports the QnA discussions (including picture uploads) here at Homeowners' Hub is having a bad day today - I get error messages from time to time, which never happened before. Perhaps you can try again?

Reply to
homeowners

I'll try doing another cast this weekend using your suggestion on the concrete.

Here are the four images uploaded to drop box. Not sure the forum allows links but if it does the pics are there.

formatting link
formatting link
formatting link
formatting link

Hope that helps.

Reply to
johndanilson

Got the pictures! Looking at the mold - it's a very challenging shape: long and shallow. I would be concerned about the integrity of the piece when you remove it from the mold. Can't really picture how you would avoid bending the piece when removing from the mold, and concrete does not really work (unless properly reinforced) in bends. It withstands enormous compression force but almost no stretching which is what's going to happen if you bend it. Perhaps some lifting fixture that grabs it at all the three holes at the same time. It's a heavy piece, how are you handling it once out of the mold, anyway?

I think it's still worth the try but, again, I would give it as much time as you practically can before de-molding. Can you leave it for three days? A week? You would have to make sure the surface of the poured concrete is always wet through all this time. Wrap it in a plastic sheet and check on it in a day or two - may need a splash of some extra water once it started to cure.

Please post some pictures of the berm when it's ready - I am very intrigued by your project myself.

Good luck!

Reply to
homeowners

It appears my last update was lost.

My plan is to do the pour on Saturday and leave it in the mold the entire week (7 days). I plan on using your suggestions on the mix and I am also adding some rebar to the project in order to give it more strength. I'm hopeful that 7 days will give me enough strength and if so I'll pour the other 3 pieces.

I'll update with more pictures this weekend. Stay tuned. Could be fun.

Reply to
johndanilson

Sounds like a plan! Keep us posted and good luck!

Reply to
homeowners
Re: how to build concrete berm (think speed bump only smaller) open original image

Well, it appears as a total bust. I pretty much did as discussed. After sitting all night I took off the plastic to add some moisture but found the concrete completely cracked, not hard at all, and the mould totally wet. I'm not sure what the explanation is but I'm going to look for alternative solutions now to casting these. I think the berms will have to be poured in place and perhaps formed using some sort of machine like a curb machine. I'll update this as I get more information, but clearly this approach is not working so it's time to try something else.

Reply to
johndanilson

Sorry to hear this. Yes, the result does not look good. Not that it matters for this particular cast but I have to ask: was any part of the mix hard? I can see why the crack might appear - the moisture damaged the wooden mold and it was actually moving (warping) while the mix was (supposed to be) curing and absolutely immobile. But having no part of it solidify in 12+ hours is strange. You've only removed the large aggregate from the mix, right? Did you add sand?

Reply to
homeowners

None of the mix was hard.

Yes, large aggregate > 0.25" was removed.

Yes, I added sand based on the volume of aggregate removed. I think the sand made the concrete less strong but that is simply my impression and I am no concrete expert. I was very careful to measure the volume of aggregate removed and used the exact amount of sand as a replacement.

My sense is that the general purpose concrete is not the right mix. Based on your experience, and irrespective of cost, is there a type of concrete mix I can buy which might do better. I might be willing to try this one more time.

But I am also considering alternatives. I am thinking that it may be better to cast this in place at the top of the driveway using a simple rectangular form placed on the ground and having a height of some 2" (think of a rectangular box constructed of 2x2 laid on top of the street apron). Then as the concrete cures, but before it is set, sculpt the leading and trailing edges to be curved. I was also wondering if some sort of "curb" machine might be available that would form the berm. And lastly I may simply resort to hiring someone who does this for a living.

Reply to
johndanilson

ok, I will have to rebuild the mold but will do so. Expect an update over the weekend.

Reply to
johndanilson

John, I would try once again with the same mix, larger aggregate removed, but no sand added. Looking at the picture of the failed cast, it appears to have sandy brownish color. I don't know if this is a color balance or the actual color of the resulting mix but that looks like the mix has too much sand it in or it's not evenly distributed.

Every time you add something, you're going to need to thoroughly mix the addition in with the rest, and I failed to ask you earlier how were you going to mix it? Unless you have a concrete mixer, the results may be affected by the thoroughness of mixing. I have done some mixing by hand (at a much younger age) and it was not fun, so I think for the purpose of saving some back pain and mix consistency, I would just keep the ready mix, remove what's not needed but don't add anything. The yield might be less in volume but should work. And, obviously, saving by adding sand and having a failed cast as a result is a false savings.

If you're going to use the same materials for the mold, don't wrap in all around, just lay a piece of plastic sheet ontop of the poured mix or skip the plastic sheet altogether, just remember to come back every so often and sprinkle some water on it. Concrete needs water for proper curing (not flowing water, just wet surface) but if the same water damages the mold materials, you're going to have to find some balance between the two requirements.

I still think you're going to have a better chance at finally casting a proper piece in a mold than to "sculpt" concrete while it's curing. I've never done it myself and I am skeptical about whether this approach will work. Also, if casting in place fails, the cleanup efforts will become so much more difficult.

Good luck!

Reply to
homeowners

I'm wondering if you've seen this discussion here:

formatting link

It's pretty old but the problem of heavy rain water getting into garages is as old as the first horse drawn carriage shelter :) Check out the post by "LB" who says "the car is not really happy going over it" (the concrete lip he made). He does not say anything about the profile of the lip, I'm thinking it's probably not as curved as yours.

Anyway, I just stumbled upon that old post and thought it is relevant to your project.

Reply to
homeowners

Yes, I saw that as well as many similar solutions. Putting a dam near the garage door is only a partial solution.

One of the key issues we want to fix is that not only do we get a tremendous amount of water from the street but also debris washed down. We typically have to empty the french drain several times during the thunderstorm weather period (April to September). So we want to put the dam up at the top so that the water and debris continue down the street and go into the very nice and very large storm sewer.

Reply to
johndanilson

Not much positive to share here on the progress. I cast the new speed bump on Sunday and will let it dry for 7 days. But I can already see that around the edges it is not holding together. I am afraid this approach is not working; a final verdict will be rendered on Sunday a week. Stay tuned.

Meanwhile I have contacted several concrete vendors in the area to get estimates and approaches to solve this problem. So far three have said they would cut out the existing street apron fronting the driveway and rebuild it with a speed bump. The cost estimates range from $1400 to $3500. Again, stay tuned as I'll update this when it's done.

Not fixing this issue is not an option. She-who-must-be-obeyed has deemed that the water must be stopped.

Reply to
johndanilson
Re: how to build concrete berm (think speed bump only smaller) open original image

As expected, even after curing for six days, the resultant concrete speed bump has no structural integrity. I am going to engage a concrete contractor and will post details here.

For the record, total time, about five Saturday mornings to pour and cast the concrete failures and another evening or two to build the mold. I'd say total expenditures were in the $100 range for concrete mix and the concrete forming tubes. The wood for the form I had as scraps.

A picture of the latest failure is below.

Reply to
johndanilson
Re: how to build concrete berm (think speed bump only smaller) open original image

So, for $1500 you can get professionals to do it or maybe you're comfortable doing it yourself. Here's what they did.

1.cut our section to be replaced with a concrete saw.
  1. Remove the concrete with a jack hammer.

  1. Leave some crumbled concrete at the bottom of the 10" hole

  1. combine sakrete high strength & quick setting concrete mix.
  2. pour and shape by hand.

Pictures show the results. I could not be happier.

Reply to
johndanilson

HomeOwnersHub website is not affiliated with any of the manufacturers or service providers discussed here. All logos and trade names are the property of their respective owners.